Stumpwork Yoshi

My almost 14-year-old step-son recently asked me if I’d make “one of those circle things I do” for him and his specific request was Yoshi from the Super Mario Nintendo franchise.   As this is the first time he has ever asked me to make him something I could hardly say no.

With every project I undertake, whether it’s dressmaking, hand embroidery, knitting or crochet, I like to develop my skills.  So I thought I would put to good use the Royal School of Needlwork Stumpwork book I picked up from a charity shop last year for the bargain cost of 50p.   Yoshi’s face seemed to lend itself to a raised element, with his giant green nose, so I decided to use a needlelace slip technique to create his face.   In stumpwork embroidery, a slip is any separate piece of embroidery worked off the frame and then applied to the main embroidery.   There are lots of different ways to make slips, they can be wired; which is great for elements you want to stand out from the fabric such as petals of a flower; can be made from counted canvas, needle painted or plain fabric.   I decided to use needlelace, mainly as it is a technique I have not yet tried.
img_20170221_132204

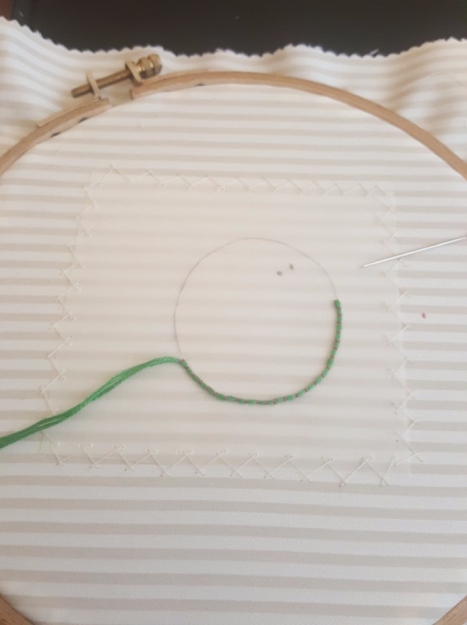
Couching for needlelace slip

The process starts by tracing the shapes you wish to make.   I added a couple of milimetres to the edge of the slip as I intended to pad it, meaning it would need to be slightly larger than the original shape.   I should point out that I haven’t really used the right embroidery floss for this.   Ideally a Perle thread should be used but I only have stranded cotton at the moment so that had to suffice.

Once you have traced the shape the tracing paper is then stitched onto a backing fabric with either a herringbone or running stitch.   The tracing paper helps to protect your needle from the backing fabric and creates a barrier between the needlelace and backing fabric.   You then couch a thread around the outside of the shape, which is known as the cordonnet.   This is the framework for working your needlelace over.

img_20170221_151329

Needlelace slip starting to appear.

The needlelace is created with buttonhole stich, working from left to right, taking the working thread underneath the cordonnet  once you get to the end of the row and working the stitches like corded buttonhole stitch, taking your needle under the first loop of the previous row, underneath the cord and over your working thread.   I’m not great at tutorial’s so here is a great link to a tutorial for a needlelace heart.

Once I’d created all the shapes I needed, it was time to start assembling the piece.   First of all I used some cotton batting to pad the areas of the embroidery I wanted to stand out.

img_20170223_121710

Padding and starting to apply the slips

I then used a single strand of floss in the same colour as the slip to carefully stitch the edges of the slips to the main fabric or each other, where appropriate.

img_20170223_170610

Needlelace slips assembled

Finally I used an attached woven picot, similar to that used for my Wave piece, to create Yoshi’s spikes down his back.   His mouth and eyes were finished off with satin stitch.

img_20170224_122058

Yoshi’s finished face

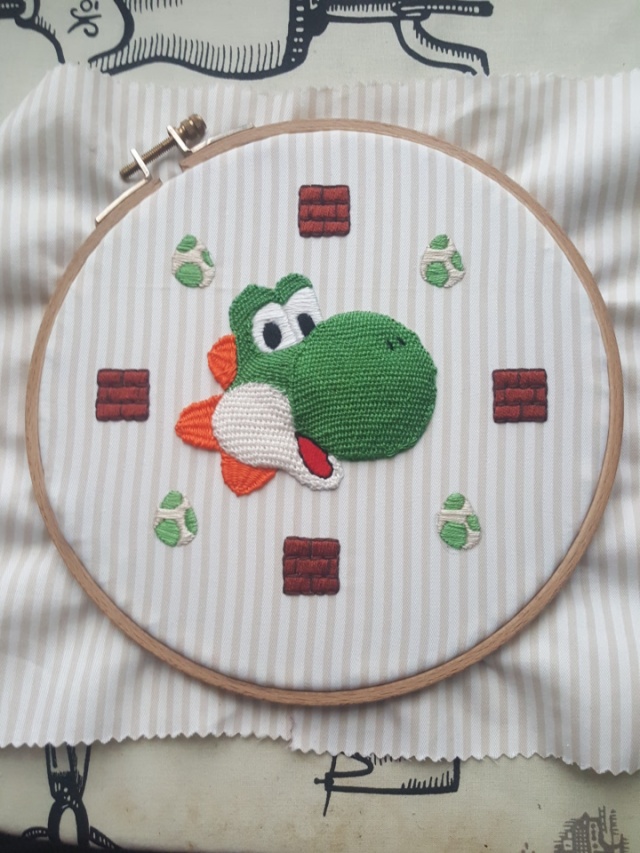
I love the effect this created, I think it gives him so much more character.   To make the hoop actually look like a finished piece I created a border of Yoshi eggs and the brick blocks from the classic Mario games.
img_20170225_092732

The finished piece

I had great fun making this piece and I was put in the post to my step-son today (he lives about 100 miles away from us now after we moved from Hampshire to Warwickshire in 2015).

I hope you enjoyed me waffling about this piece.   If anyone is interested, I have finally decided to open an Etsy shop and have already listed a few items, including my Wave piece.

Greetings from the Midlands

Well, those couple of months I said I would need to settle in in my new home in the Midlands quickly stretched to nearly a year and a half. I’m really sorry about that. Suffice it to say that I have been spoilt with the additional free time my new job provides and have been using every free moment to craft.

As I no longer work in an office and am home based the majority of the time, my need for new, smart outfits has diminished. There have been a few new dresses, jeans and t-shirts made in the last year but generally my dressmaking activity has reduced.    However, my work desk at home is in my sewing corner and the desk with my machines on it is next to me whenever I’m working, meaning that, if it’s quiet, I can sew while I’m being paid.   I always said I wanted to be paid to sit at home and sew all day, and now I do.

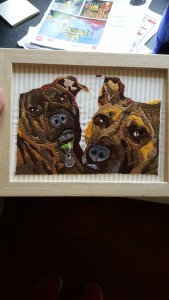
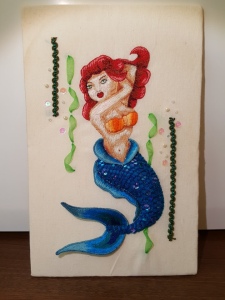
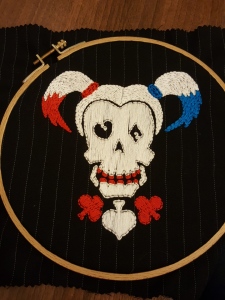
Sewing a whole garment when you could get an urgent call at anytime is not ideal, however, and there have been occasions when a half-finished maxi dress has been hanging from my sewing machine for more than an hour with a seam half completed, just because work has picked up.   This meant that I needed to find something I could do when on shift to keep me occupied in the quiet periods but that was easy to put down if I had a call come in.   I started hand embroidery completely by accident when I was trying out some free motion embroidery with my machine and I couldn’t get it to do something and had to resort to sewing by hand.   In the last year I have produced quite a bit of hand embroidery, particularly for gifts over the Christmas period, and my skills have increased.   Here’s a few examples.

20170124_115155 img_20161117_112509img_20161010_191058

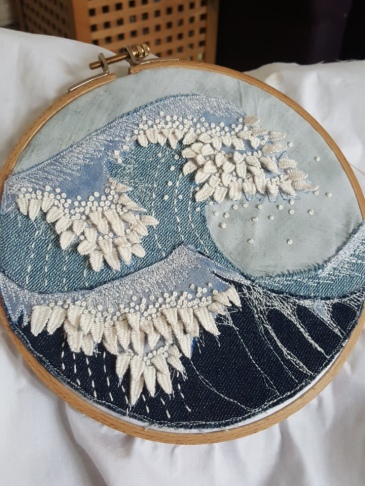
This week I finished a piece based on the woodblock print “The Great Wave off Hangawa” by Hokusia. Which has completely taken off on Instagram.

img_20170214_144057

I’m used to getting about 65 likes maybe on Instagram but when I posted this piece I went on a 4 hour drive and when I got home I had over 200 notifications on my phone and climbing.   I wasn’t sure what was going on and eventually the likes stopped at just over 4000!!!!   My followers also more than doubled in a week.   This gave me the hint that a few people out there might like my embroidery work and I thought I ought to kick this blog thing back into gear and tell you more about my embroidery.

When I decided to make this piece I was in a creative slump between projects and had no idea what to make and had little inspiration.   My husband had recently relegated several pairs of his old jeans to my fabric pile and so I had quite a bit of denim to work with.   One of the styles of embroidery I have been learning more about recently is Sashiko and with it’s Japanese origins for some reason Hokusai’s wave popped into my head and I thought I could combine the denim, Sashiko and the Wave into one piece.
The background was achieved using free motion machine raw edge applique and embroidery and I added wave peaks using a stitch called detached woven picot.   Here‘s a YouTube video on how to make these stitches.   I then finished off with some French knots.   This piece is not at all what I had in my head when I started it as I had envisioned using some beads and pearls and possibly even some lace to add to the frothing wave heads, but halfway through the woven picot occurred to me and I thought it mimicked, but didn’t duplicate, the fluid curls of Hokusai’s waves so beautifully that adding anything extra to it would be excessive.

I hope you like this piece.   I hope to post more of my crafty endeavours in the coming weeks, certainly before another year passes.   Catch you soon.

First attempts at free motion machine embroidery

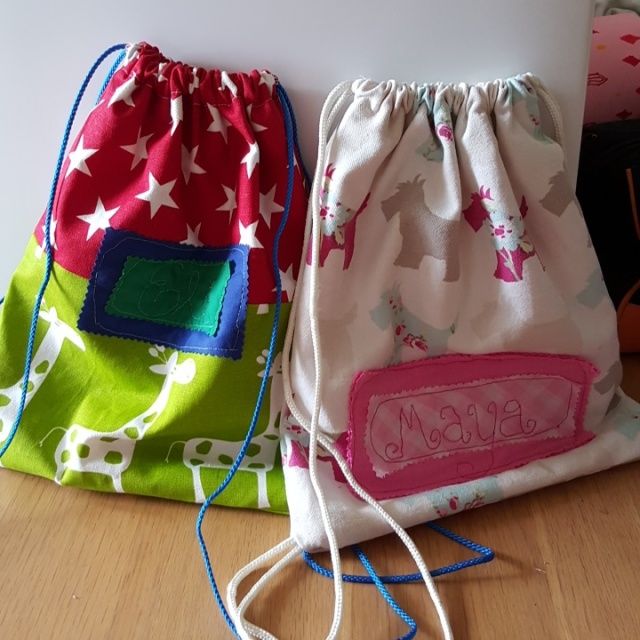
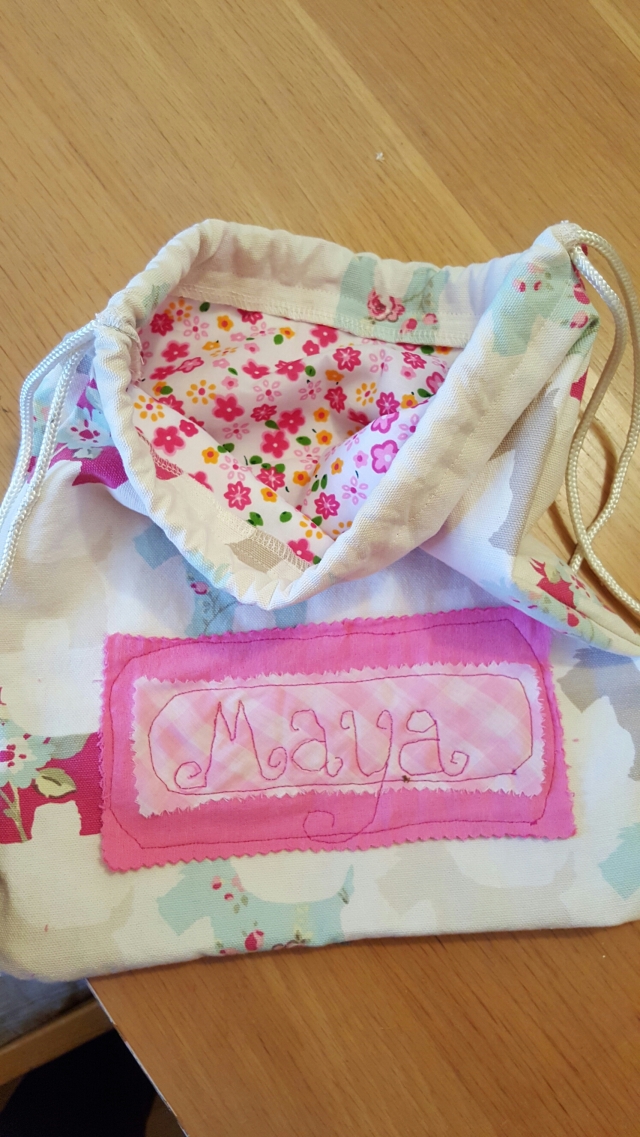
I’ve completed my final project before we move house.   As the kids have gone back to school, I didn’t want to fork out on school insignia emblazoned uniform and accoutrements as I’m going to have to buy it all again for their new schools (yet to be sorted out and we move it 2 weeks! Eeeek!). However they still need to take their PE kits in and a carrier bag just wasn’t going to cut it.   I had some bits and bobs of canvas in the stash so decided to whip them up a couple of personalised bags, using this tutorial.
image

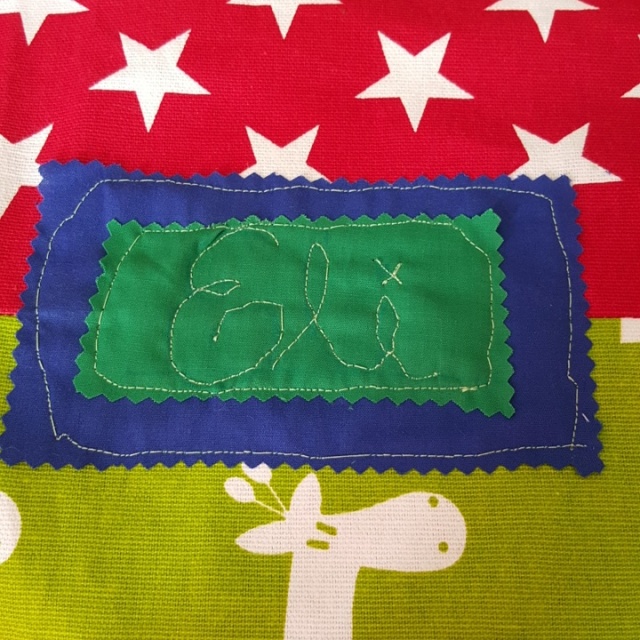
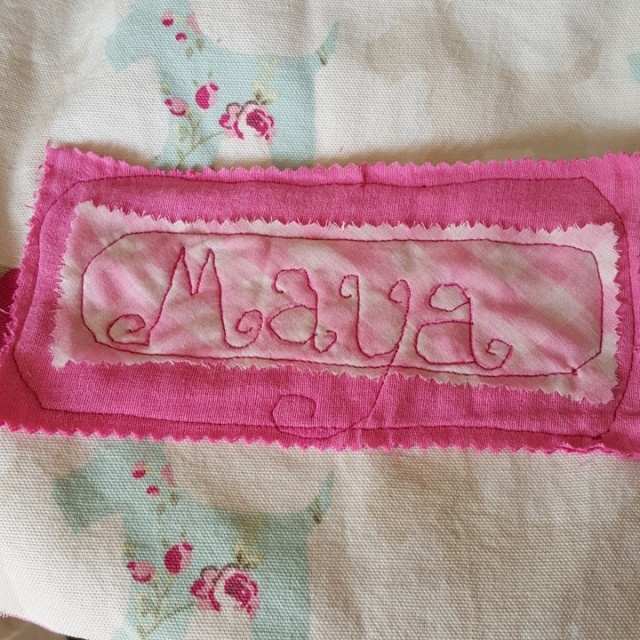
To personalise the bags I decided to try a bit of free motion machine embroidery.   My results weren’t amazing but not bad for a first try. I struggled with moving the fabric under the presser foot, even with the foot pressure set to the lowest.   It didn’t help that Eli’s name was stitched over a bulky seam line.

image

image

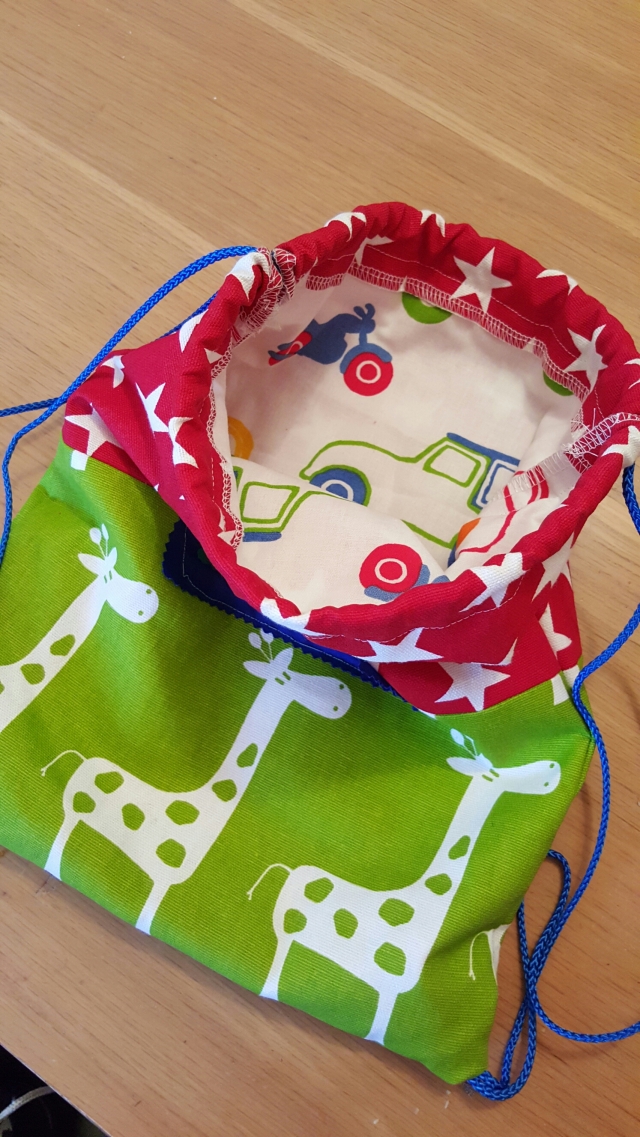
I lined the bags too.

image

image

The materials, including cord were ntirely from my stash too, so zero cost.

My sewing stuff all got packed away after I finished this project. The conversation with my husband went something like this.

Me: I think I’ll pack my sewing stuff. I won’t do any sewing now until we’ve moved.
Tobi: Yeah, I’m not sure I like that idea.
Me: Why?
Tobi: I like you reasonably stable.

For me, like many, sewing is a form of therapy. A mindfulness exercise where you can be nowhere other than in that moment. When I’m feeling particularly anxious, worried or low Tobi has been known to usher me towards my sewing machine as he knows he will get his level-headed wife back at the end of the evening.

I’m not sure I’ll have anything to post between now and the start of my new job in mid-October. But I’m hoping to make it to Charlotte’s (English Girl at Home) SewBrum meet-up on 31st October as I will only be half an hour away on the train. Fingers crossed the rota for my new job has me off on that day.

Until then, adieu.

Changes ahead

Hello everyone. I’ve been a little quiet over here in blogging recently but that’s because in real life loads has been happening and it’s been exhausting going through it, let alone writing about it all. I wish I could say that things are calming down, but far from it. However I thought I’d been neglecting you all so I’m here to give you an update.

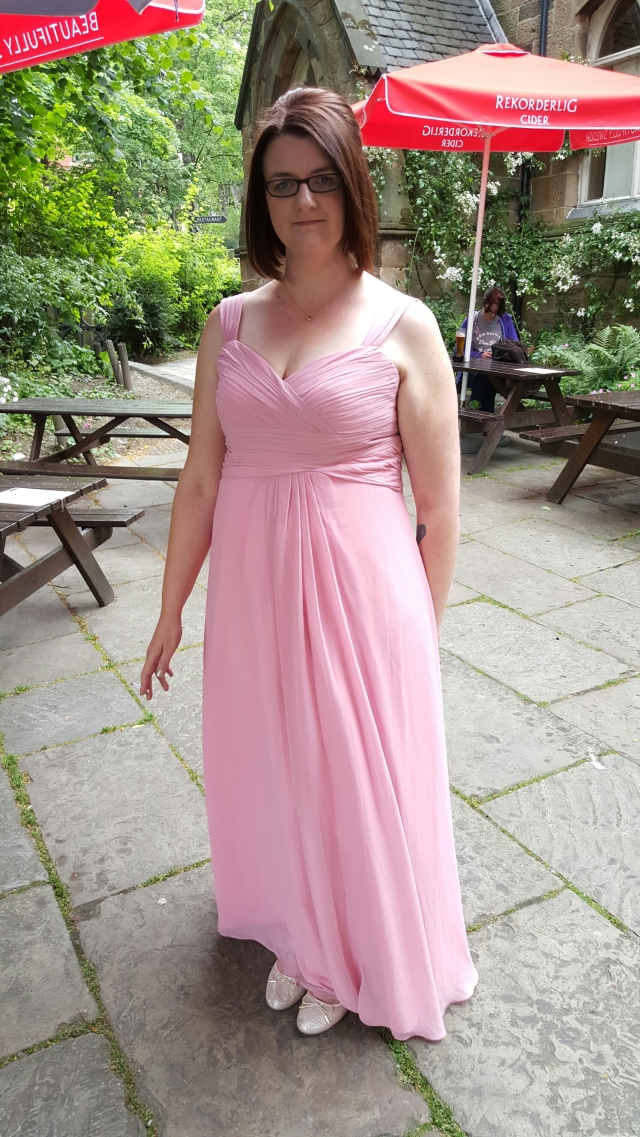
At the end of July my oldest sister, Bryonie, got married and I was a bridesmaid. So Tobi and I trekked up to Glasgow for the wedding and four nights blissfully child-free.

image

image

Me looking a bit like Amy Winehouse and classy with a cigarette in my hand.

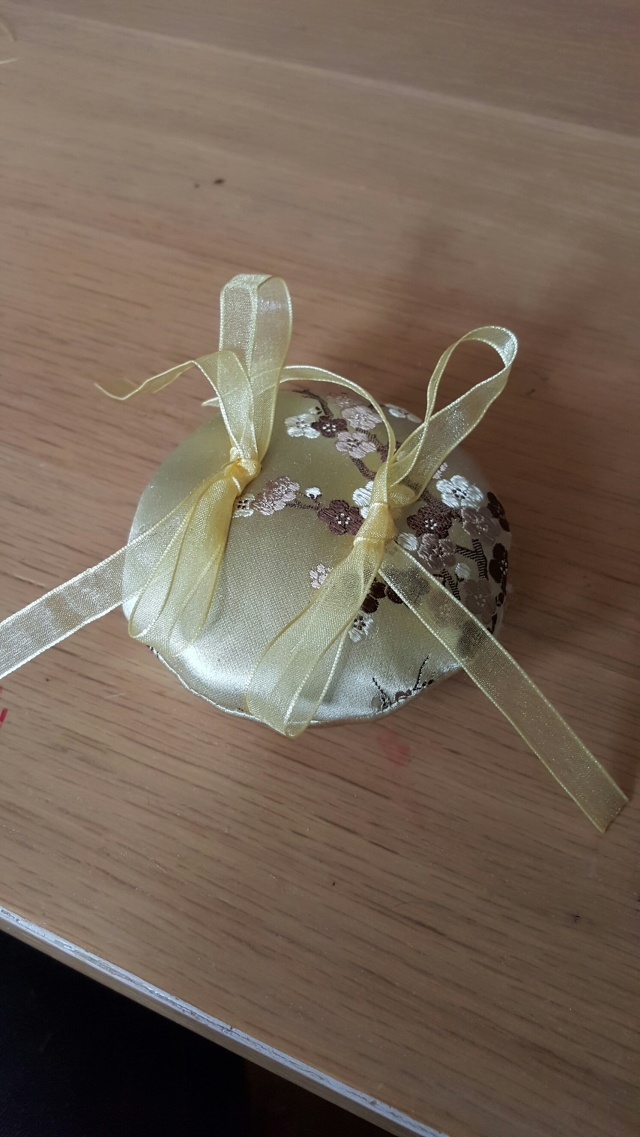
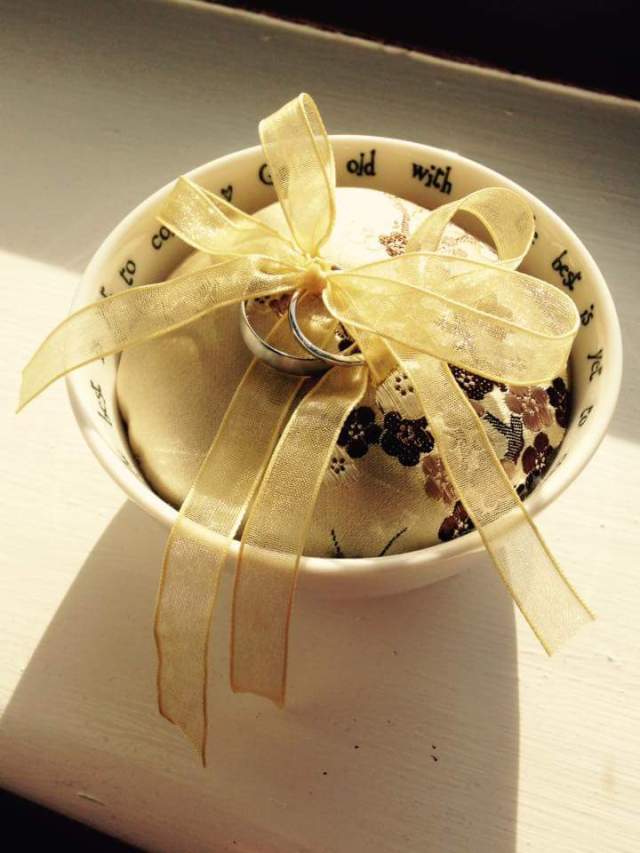
My sister asked me to make a ring pillow for the wedding to fit inside a teeny bowl she had bought for my nephew, the ring bearer, to carry up the Isle.

image

image

It only took me about 5 minutes to make but looked nice and the day and served the purpose of preventing my nephew from dropping the rings on the floor.

Whilst in Glasgow I managed to make it to Mandors and picked up some souvenirs.

image

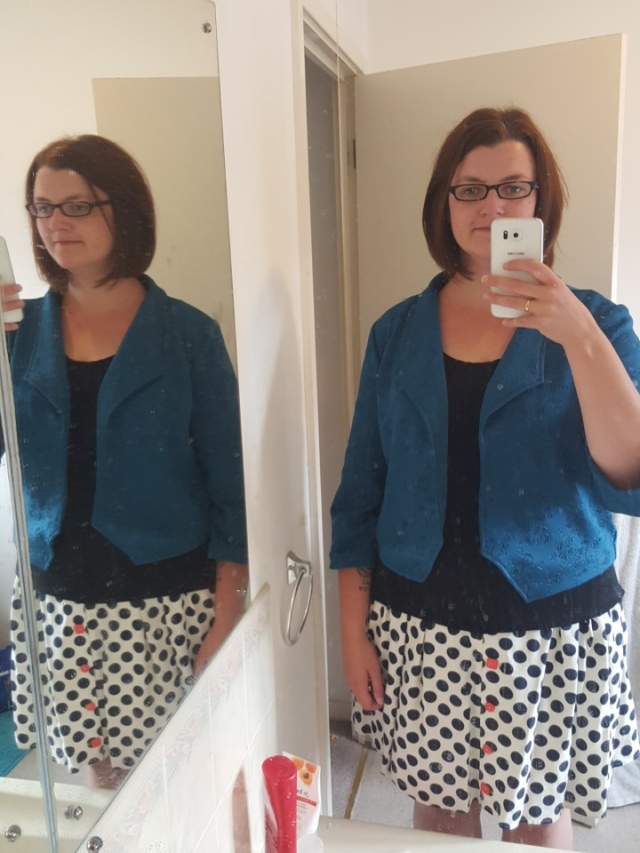
Petrol coloured embossed scuba fabric and stretch denim (for another pair of Ginger jeans) with stars on it.   I’ve already made up the scuba fabric into a Grainline Studios Morris blazer.

image

Love love love this jacket.

As soon as we got back, I needed to get behind my sewing machine; you know the itch that you can get sometimes. I quickly made up this dress for my daughter.

image

image

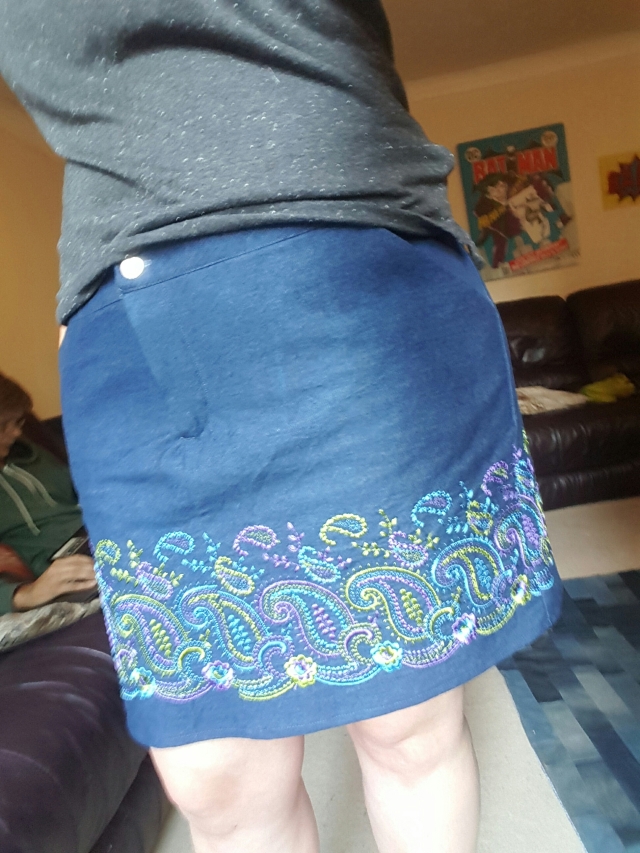
It’s made using pattern W, the pinafore, from the Girls Style Book by Yoshiko Tsukiori and she really likes it. The fabric I used was a medium weight border-embroidered denim that I found at a local car boot sale and managed to pick up about 3 metres for £3. I so do love a bargain. I’ve also made a Grainline Studios Moss skirt with this fabric but sadly I made the waist a little too big and it falls down.

image

After the Glasgow trip we came home to take our children away to the Isle of Wight ‘glamping’ in a safari tent. This tent was epic!!! The bed was more comfortable than mine at home.

image

image

We had a great time and will definitely be going back.

Now I come to the thing that has kept me most busy over the last few months… I’m moving to Warwickshire, Rugby to be precise, at the end of September. Due to changes in my husband’s employment he decided to go for a job with his old company in Leamington Spa. I have also got a new job, still Social Work, but a promotion and I should have more free time and a better work life balance so I’m looking forward to it.

After we had already decided on moving I discovered that Warwickshire is a regular mecca of sewing bloggers/seamstresses. Roisin from Dolly Clacket lives in Leamington Spa, Sarah of a Million Dresses lives in Warwick as well as Ali Goddard from Twitter. I’m sure there’s others I’ve missed.

Coventry and Birmingham are just a stones throw away from Rugby so I’m looking forward to exploring the fabric shops locally as well as the Birmingham rag market and making a trip to Guthrie and Ghani.

We move at the end of September with me still in my current job until mid-October and having to stay with friends in Hampshire until I’ve worked my notice period. Therefore I may continue to be quiet in these here parts for the next few weeks. I promise sewing is still going on.

Bonkers for Bucket Hats

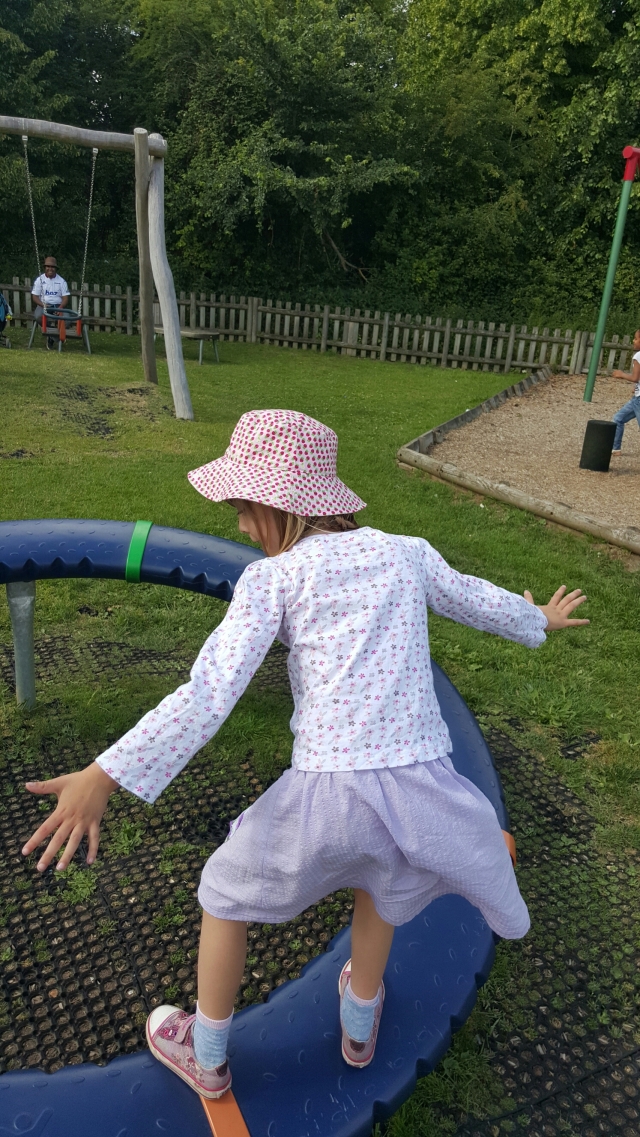
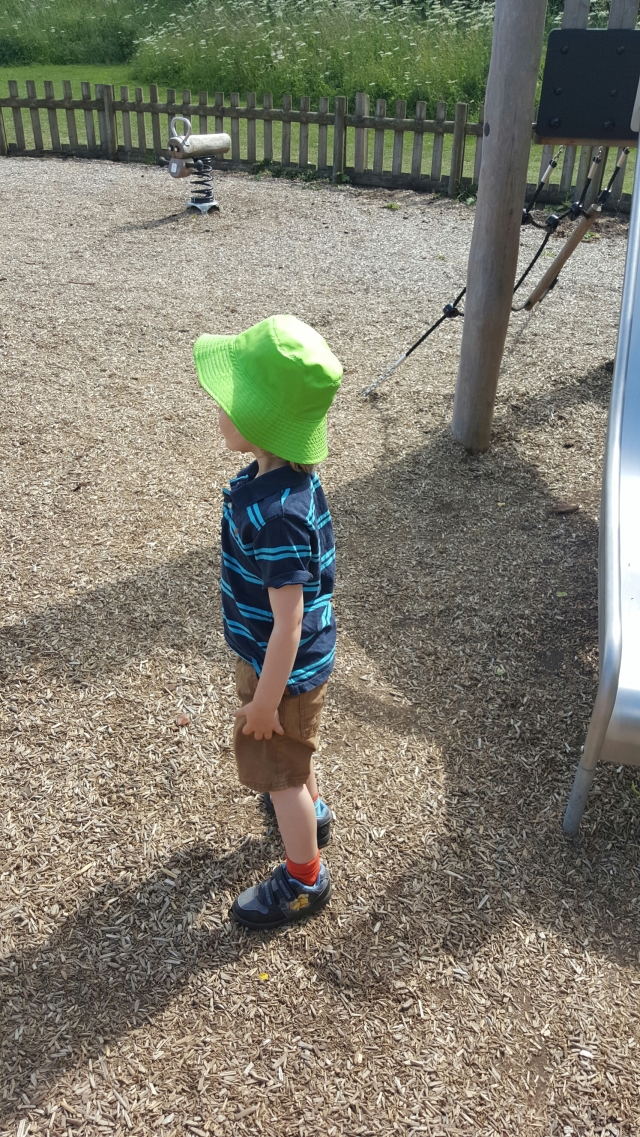
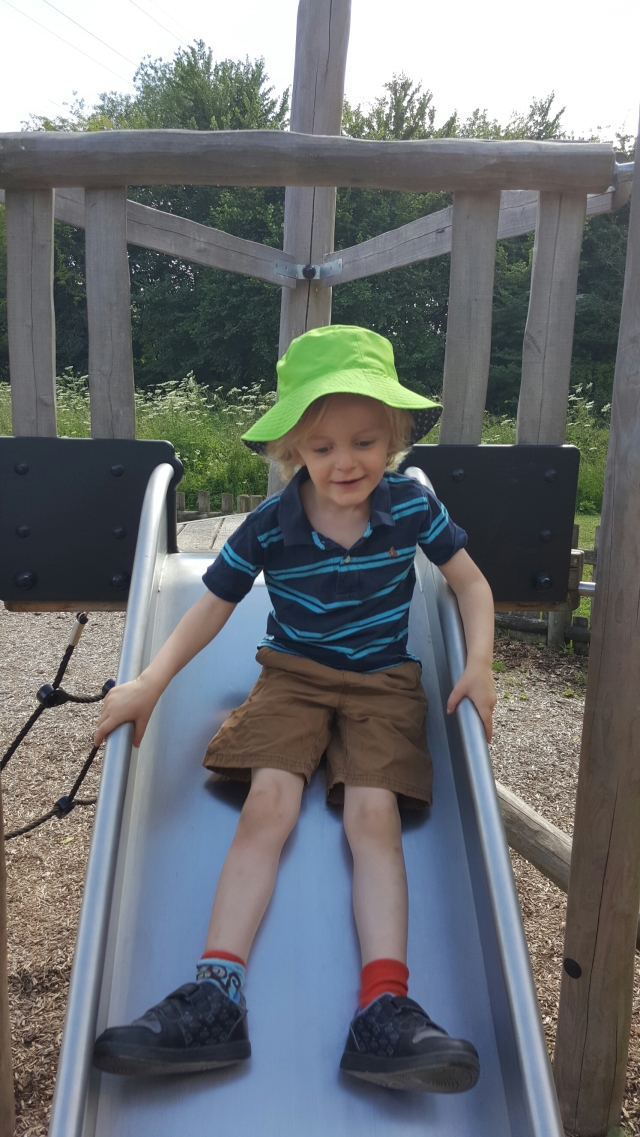
I love summer. Unfortunately, now my daughter is at primary school, summer also comes with the dreaded dress down days in exchange for tombola prizes or raffle prizes for the summer fete. Emotional blackmail for the parents, I feel. Anyway, for once I decided to make an effort. Or, if u want the real reason I decided to sew these hats, we were broke and couldn’t afford an appropriate, travel related prize.

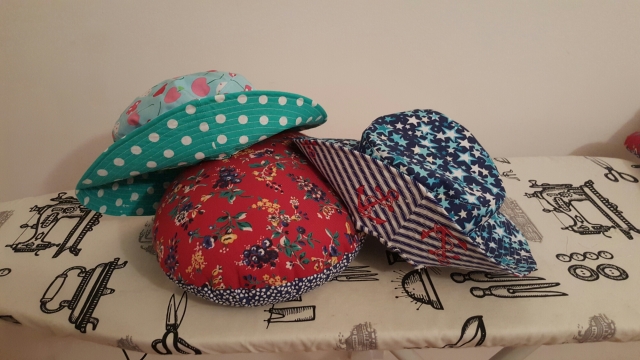
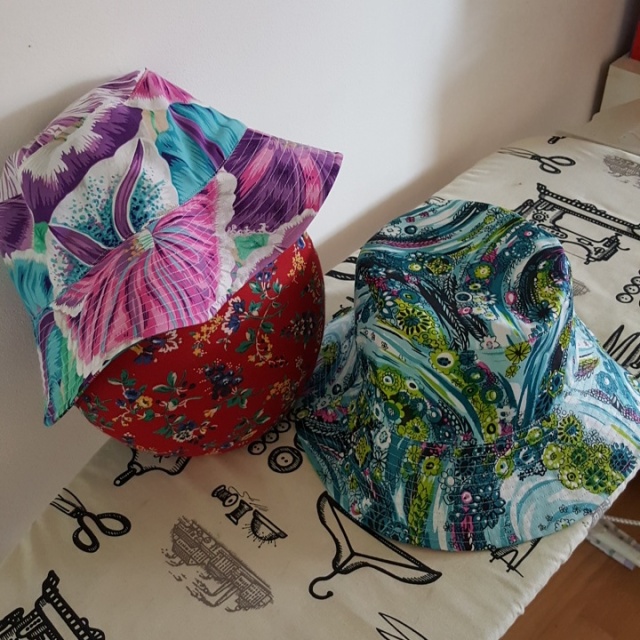
As luck would have it, I had just picked up a bundle of cotton prints (mainly small-ish pieces) from a local Facebook selling page. I dragged out appropriate prints to make two hats- one for a girl, one for a boy; and found the free Oliver and S Bucket hat pattern that I printed ages ago and never got round to making.

This is the result. I was up until 1am the night before dress-down day in order to complete these.

image

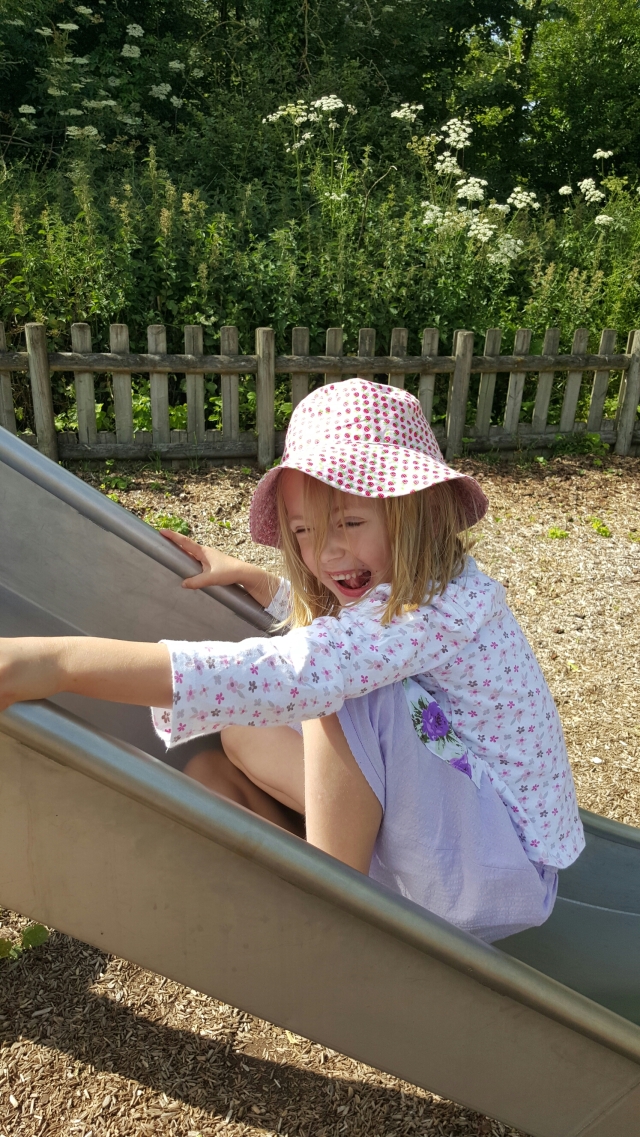
Of course, having seen these cool hats and not being able to keep them, my 2 littles wanted hats of their own.

image
image

image

image

And then my Mum, messaging me from Spain where she’s on holiday, having spied the hats on my Facebook page, wanted one of her own. Well, if I was making adult sizes I wanted to get in on the action too. So, I printed out the pattern again but scaled to 110% so as to fit our adult size heads, and got sewing again. For the grown up versions I used some vintage 50’s cotton print I picked up about 3 months ago and had been hoarding and stroking, trying to find a way I could use this, slightly waxed cotton, in a garment for myself. Reluctantly I decided it would be perfect for this hat. Is anyone else reluctant to part with gorgeous pieces of fabric? I don’t mind using them for myself but I’m worringly selfish about using my special pieces for other people. This time I bit the bullet and this is the result.

image

image

image

The top I’m wearing in these pics is my first version of the Silk Woven tee pattern from the Great British Sewing Bee Fashion with Fabric book. I used a fabulous dahlia print cotton I bought at the Knitting and Stitching show last year.

I love these hats but, having made 6 in just over a week, I think I’ll move on to something else now. All that top-stitching on the brims made my eyes go funny.

image

Three Amazing things

Do you ever make a project that really doesn’t turn out the way you planned, but you still learn loads and are super pleased with the outcome, despite the garment’s inevitable destination of the charity shop bin? That’s exactly what happened to me with the project I made a week or so ago.

image

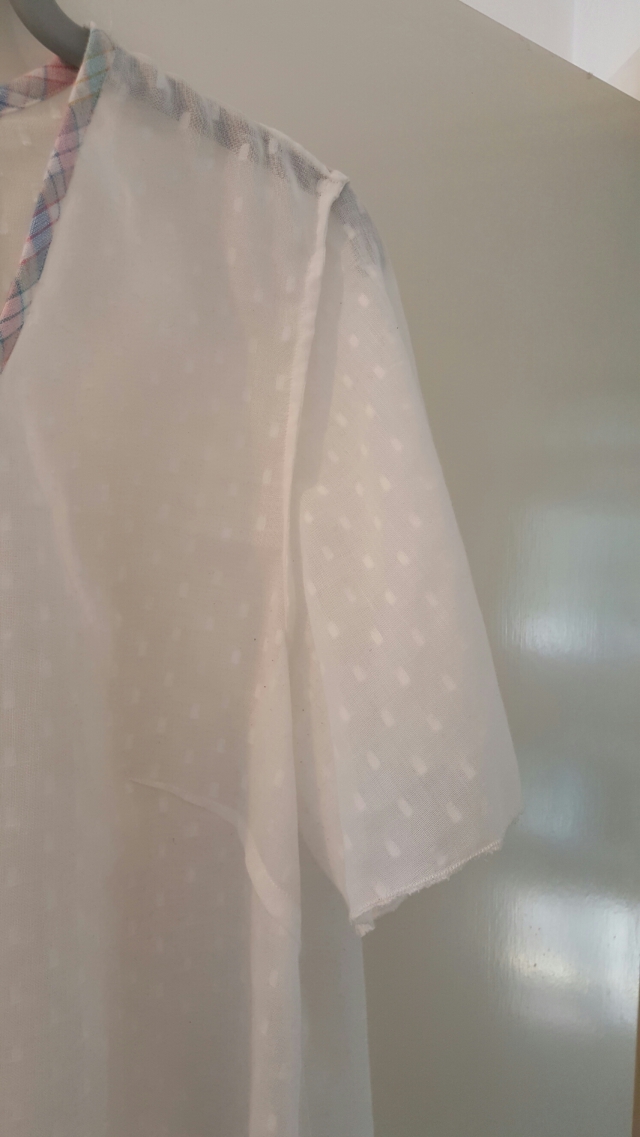
I wanted a floaty, breezy top to go with the Capri trousers I’ve recently made (yet to be blogged, as is half of the current contents of my wardrobe). As a Base for the pattern I used the Silk Woven tee pattern from the Great British Sewing Bee Fashion with Fabric book (3rd series book). I’ve already made this pattern once and the only adjustment I needed then for a well fitting garment was to drop the bust darts by 1.5″- a common adjustment for me; not sure if it’s because of my long body or because my ladies have headed south after years of ballooning weight, weight loss, 2 pregnancies and breast feeding.  In order to get the floaty feel I wanted I slashed and spread the sleeve pattern piece to give me a flutter sleeve,  added an inverted box pleat to the centre back and gave it a subtle high-low hem.

Now, the pattern hacks worked just as intended but didn’t give me the garment I envisioned on my head. It doesn’t have as much flare and float as I wanted and the sleeves aren’t fluttery enough and are a strange length. However, I learnt some cool tricks during the construction. Well, not so much learnt as finally put things into practice that I knew existed.

As the fabric I used is soft and floaty I decided to use French seams throughout.  Although I buggered up the shoulder seams, don’t look too closely on the inside; my brain apparently won’t allow me to stitch with wrong sides together. The astounding thing is that I actually set in the sleeves with a French seam too.

Amazing Thing number 1:

image

image

Previously when I’ve made garments with French seams that have set-in sleeves I’ve chickened out when it comes to the armscye and just used a plain open seam. This time though I thought that the width added to the sleeve through the flutter sleeve hack might make it a bit easier and I was right. It looks soooooooooooooooo neat on the inside besides the aforementioned shoulder

image

Amazing thing number 2:

Frixion marker pens. I saw a post on these pens a while ago and immediately put them in my Amazon wish list.  If you haven’t heard of these wonder pens before they are heat erasable. So, if used to transfer pattern markings to fabric the marks then iron off easily in the process of pressing your garment. So cool and so much better than those cruddy air erasable pens- with mine the markings seem to disappear within seconds, making the whole marking process pointless.  I was feeling a bit glum last week so accidentally on purposely hit the buy now button whilst at wotk, along with a japanese girls sewing book.   These pens go on easily and are very visible and clear. They do not fade or rub off or coat your machine with dust (a bugbear of mine when using tailor’s chalk). And then when you’ve stitched your dart, or whatever, with a wave of a warm iron there is no sight of a mark to be seen. They are my new favourite non-sewing intended Sewing gadget.

image

Amazing Thing number 3:

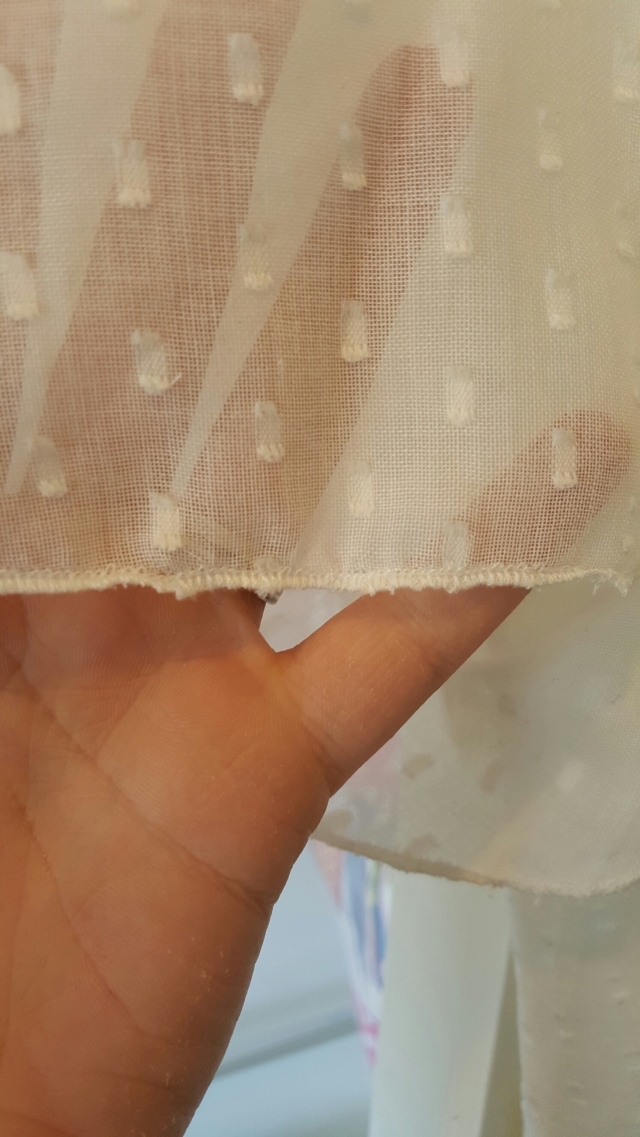
Last but not least the other fab thing I discovered in this ‘meh’ project was the rolled hem feature on my overlocker. I’ve attempted to use this before but I was too lazy to remove a needle from the machine (the rolled hem feature uses a three thread overlock stitch) and forgot to remove the stitch finger, which resulted in a whole lot of rubbish looking hem. This time I dug my overlocker manual out from the bottom of the craft box in which it resided and set the machine up properly. OMG! How cute is the tiniest hem in the world! And so lazy to complete too- just stick the fabric under machine and put your foot down- my favourite kind of hemming.

So, although this project was a bit of a wadder I enjoyed the things I learnt from it. What about you? Ever made a garment that was a disaster but taught you lots? Please share your stories in the comments below.

Sewing station tidy and more

image

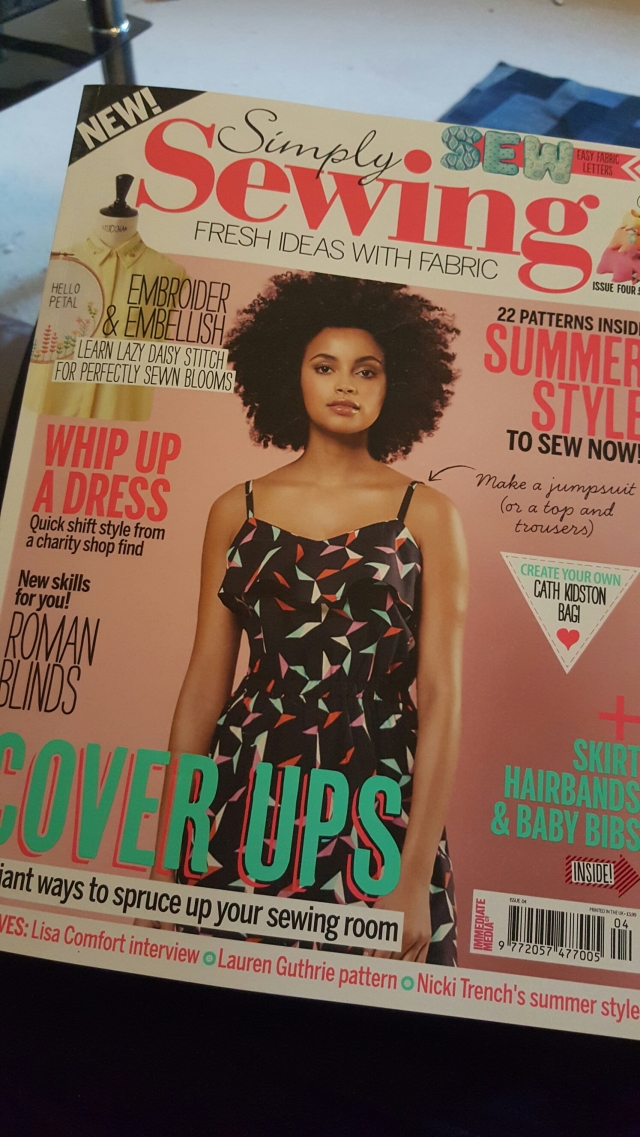
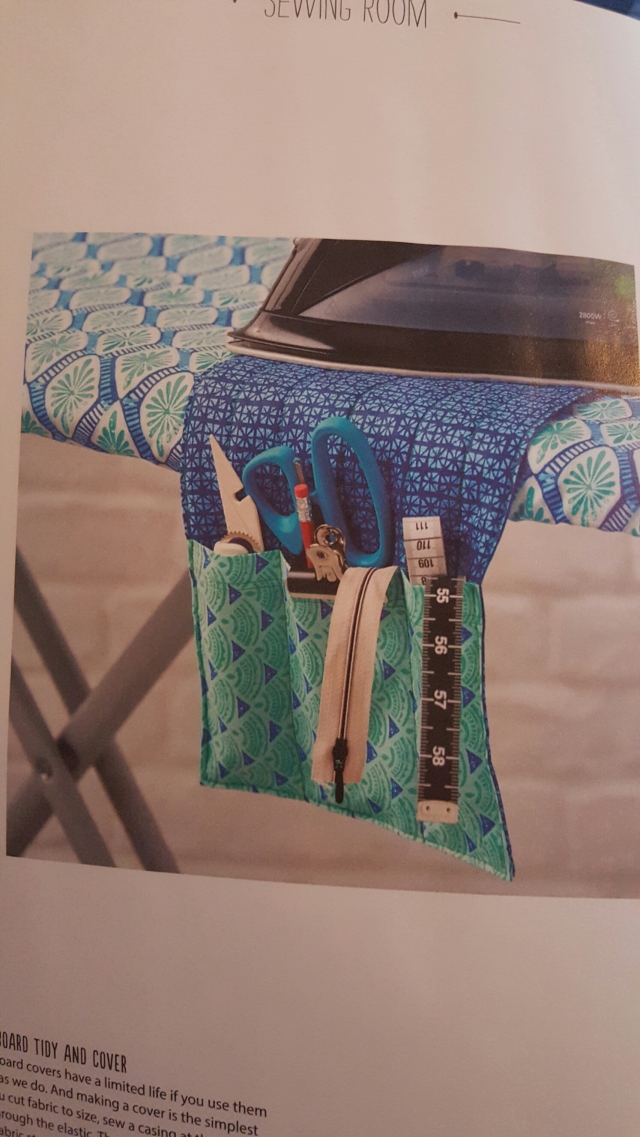
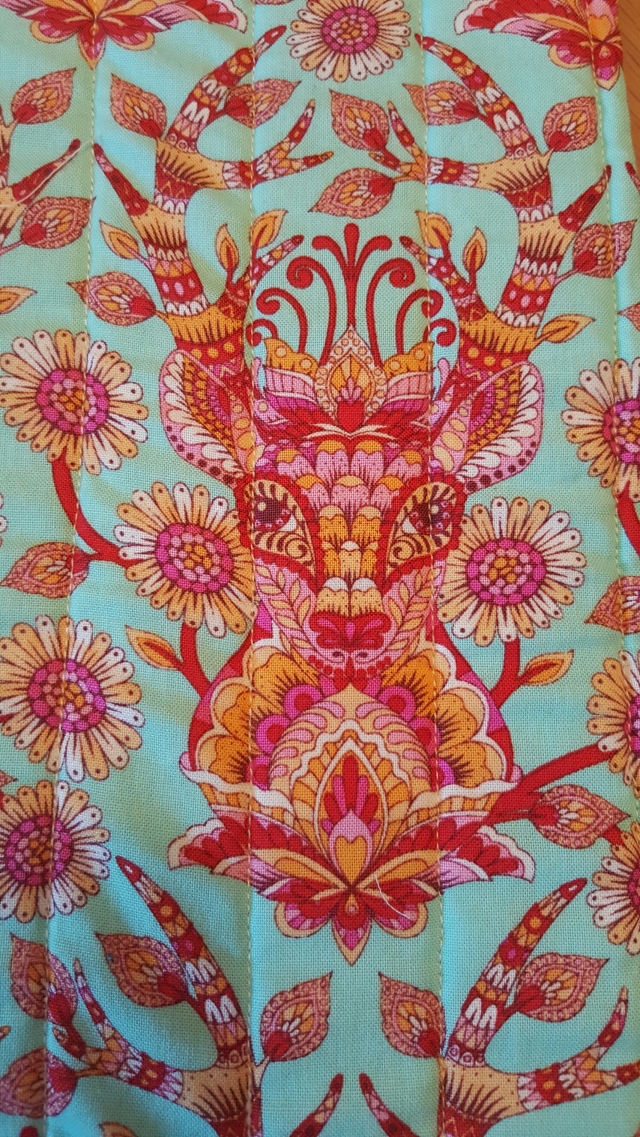
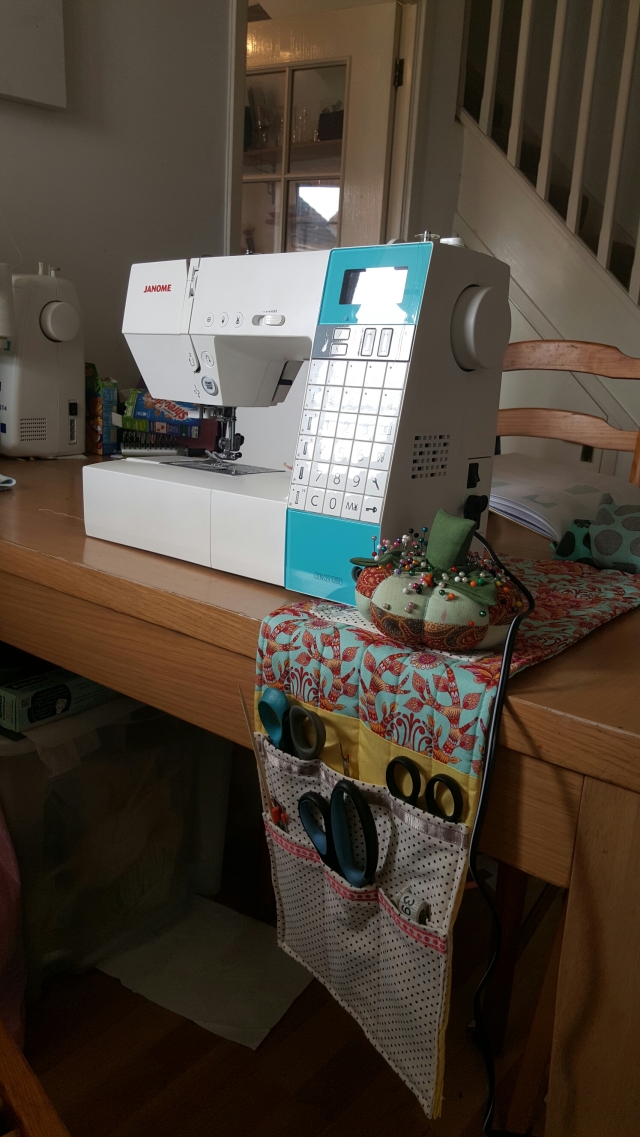
I don’t buy sewing magazines, other than Burdastyle, regularly and when I do I have never made any of the projects from them. I’m primarily a garment sewer and I rarely find that the sewing magazines on offer cater to my preferences. But I’m not here to tell you I didn’t make something. That would be a really boring post. I recently bought Simply Sewing issue 4 and have already used the great fabric clips that came as a free gift. There’s a series of tutorials to make co-ordinating items to spruce up your sewing area; including a sewing machine cover, Sewing pinafore and (the item I made) an ironing board/machine tidy.

image

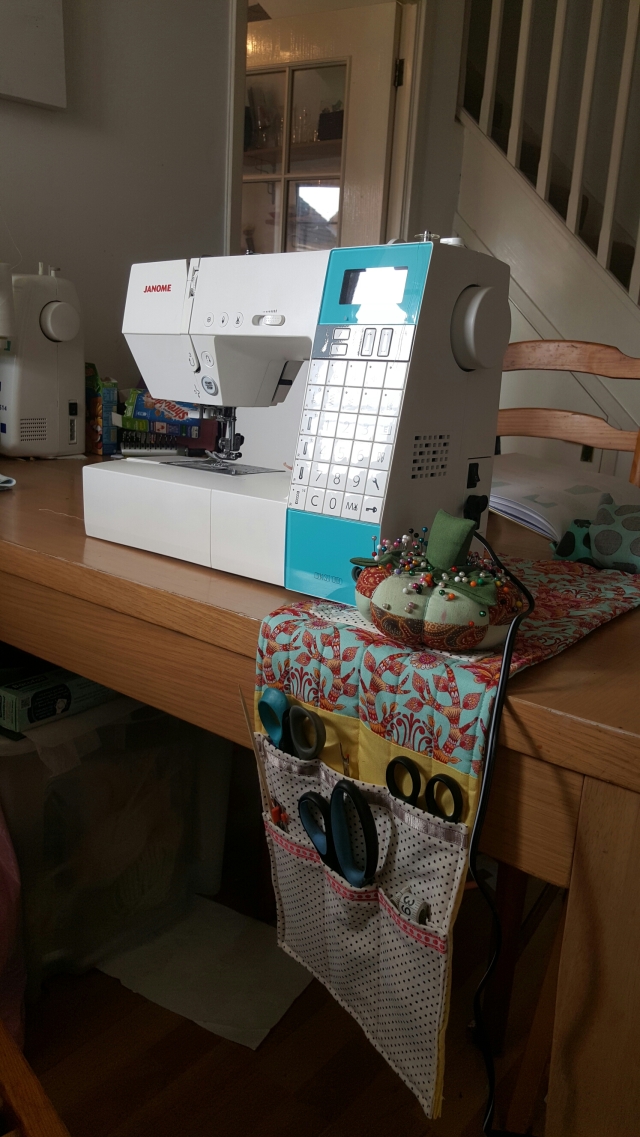
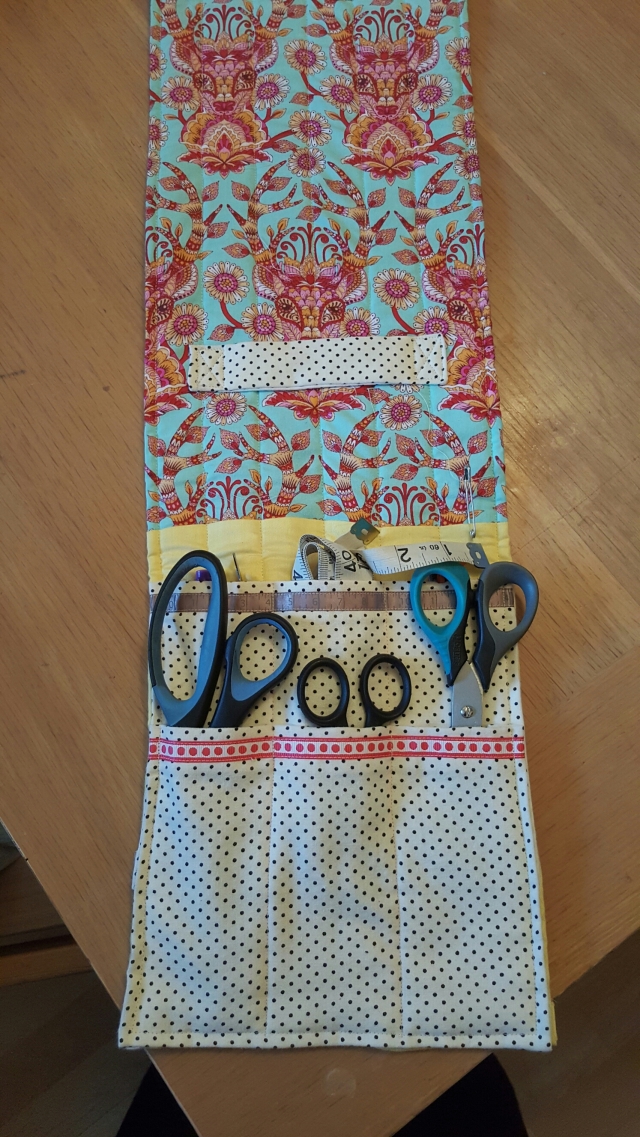
I am constantly misplacing my scissors, seam gauge or any number of other items when I’m sewing and I’ve been meaning to make one of these tidies for ages. The magazine was the prompt I needed and had handily done the thinking on size measurements for me. I picked up a fat quarter of tula pink ‘Dear Me‘ print fabric in Strawberry colourway from the Range recently. No idea why, as I never use fat quarters, but I couldn’t resist the colourway.   I’ve already made a dress out of the “Dear me” fabric in the meadow colourway and I adore it. This project proved the perfect use for the fat quarter. I had no bump interlining for the filling (in fact I have no idea what that is, but Google tells me this) so I used a piece of sweatshirt fabric to give it the required loft. As it was sandwiched between woven cotton there was no risk of the stretch factor causing a problem.

image

image

I switched up the design from the magazine as I decided I would use the tidy most at my machine so having the pockets at either end of the tidy served no useful purpose so I doubled up the pockets on one side. I prettied them up using two ribbons I was given by Andrea during Kestrel Makes Spring Sewing swap last year. The tape measure ribbon was too perfect for this project not to use.

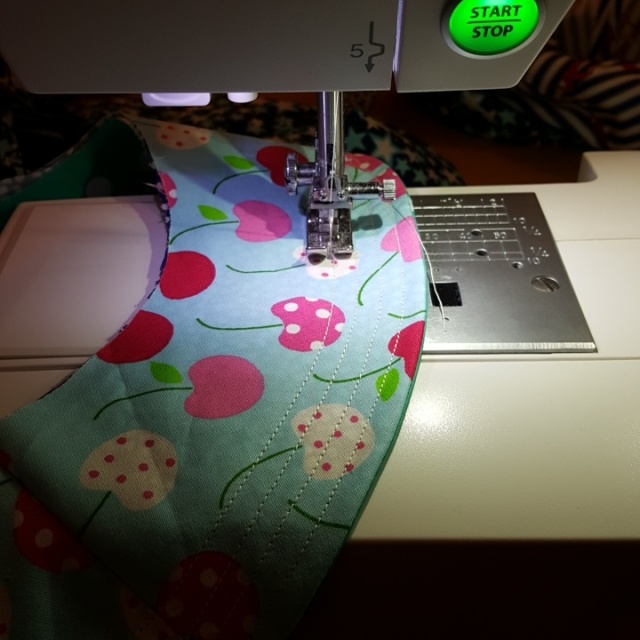
I love the way it turned out. I did find myself wishing, during the construction, that the walking foot, I ordered at the same time as buying my new sewing machine, hadn’t got lost in the post. You can see where the top layer has been dragged along slightly. I tried to counteract this to a degree by alternating the direction I stitched the quilting lines. All in all though, I love it and use it every time I sit down at my sewing machine. Because there aren’t pockets at both ends I can also wrap it up so it acts as a sewing tool roll. I also get to look at those gorgeous stags all the time.

image

Unselfish sewing

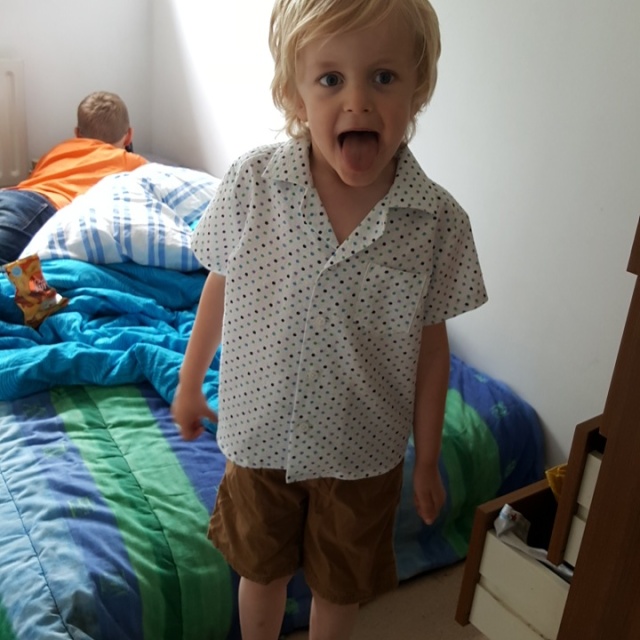
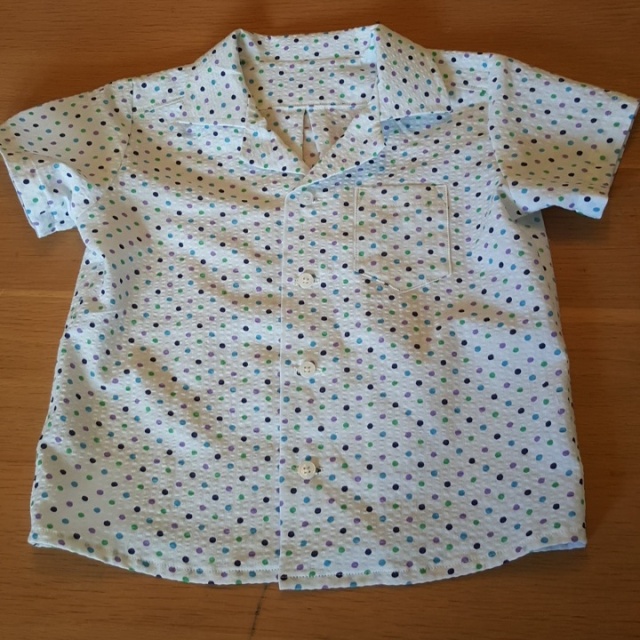
A quick aside on the garment sewing front. My son, Eli (4) guilt tripped me into making him something as, in the 2 years I’ve been sewing I’ve never made anything for him. I chose a Burdastyle pattern for a short sleeved boys shirt with camp style collar (5/2014 #146). It was a surprisingly quick make and my first make so far that there isn’t something that I’m dissatisfied with.

To cut a long story short, he hated it. But I managed to snatch a picture of him in it, although he refused to shut his mouth for the picture. How do those other mummy sewers get such beautiful pics of their kids? Anyway, here’s the scruffy little wotsit, with my 12 year old step-son in the background engrossed on a game on the tablet.

image

And the shirt.

image

Podcast-tastic

There’s been quite a few posts around recently about what people listen to while sewing; like So Zo’s post, Phoebe and Egg’s post and While she naps post.    Lots of podcasts have been mentionned such as This American Life, Serial and The Sewing Affair.   Make no mistake, I listen to all of these too (in fact, while searching for the link for Serial I stumbled accross a new to me podcast called the Mystery Show which sounds pretty good and has been added to my podcast app) but there’s a few podcasts I listen to that I haven’t heard anyone else mention in the Sewing Blogosphere and I think they’re worth a listen to.

Risk! – This is my current favourite podcast and I love listening to it whilst stitching away (as long as my kids aren’t within earshot as it’s pretty risque).   The strap line for Risk! is “True tales, boldly told” and is real people, sometimes famous, sometimes not, sharing true stories they never thought they’d dare to share- think sex, drugs and rock and roll.   I love it and have found myself roaring with laughter and getting very strange looks, especially when I listen with my headphones at work and can’t tell my colleagues what I’m laughing at as it would turn the air blue.   They usually feature several stories each episode either recorded at their live shows or in a radio style.

Scummy Mummies – This is a podcast by two female comediennes, one English, one Australian, talking about parenting topics without being in anyway prim and proper.   They usually get drunk during the recording and eat copious amounts of humous whilst giggling about the latest revolting item they have found in the depths of their handbags, deposited by a small sticky child.   This is not the Annabel Karmel of parenting, with perfectly coiffed and preened mothers and children in spotless homes and ponies in the garden; it’s real life and they talk frankly about what it’s really like to be a parent in a hilarious way.

Story Worthy – This is another Story telling podcast usually featuring one story per episode, padded out either side with witty conversations between the two hosts as their weekly guests.   I’m really enjoying story telling poscasts at the moment and Story Worthy is no exception.   It used to be my favourite podcast until I was introduced to Risk! via an episode of Story Worthy.   I sometimes find the witty banter before and after the story to be just too much and I wish they’d pack in more stories instead.

Sex Nerd Sandra – This choice of podcast may reveal more about me than I care to, but nevermind, I’ve never been easily embarassed.   This podcast is a sex-positive podcast exploring different areas of our sexuality, some of the recent topics being “sex and disability”, “Asexuality 101”, “Mulitple Orgasms” and “Sex and Depression”.   I find it a fascinating, often funny, listen and the host, Sandra, is a sex educator whom is honest, funny and warm.   I’m a firm believer that natural functions of our body, including sex and reproduction, are not things that we should not shy away talking about and should not be taboo or embarassing.   This podcast may not be for everyone, and I’m sure I’ll get some very interesting traffic having mentionned it, but I think it’s worth exploring for the open-minded.

Sewing Machine Review

I came in to a small amount of money recently and I decided, as this is unlikely to happen again in the foreseeable future, to upgrade my sewing machine.   I’ve had my new baby for a few weeks now so she has been given a good testing, so I thought I’d write about both of my machines- the basic model and the all-singing, all-dancing beast.

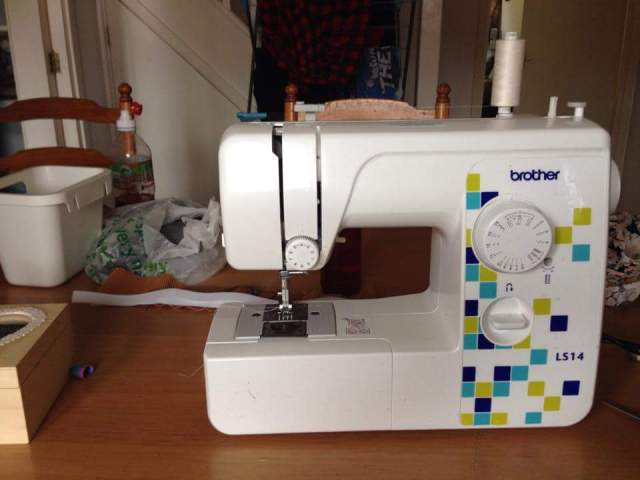
I originally bought myself a sewing machine two years ago, after borrowing a colleague’s to make a fancy dress outfit and falling back in love with stitching.  Although I didn’t buy an expensive model, The Brother LS14, it was a considerable outlay at that time as finances were tight.   Therefore my husband made me swear that I would use it at least once a week for 6 weeks.   It was that challenge that started me down the slippery rabbit hole of sewing obsession.

image

This machine claims to have 14 stitch options but several of them are different lengths of straight stitch, or widths of zig-zag.   Having said that I never found myself lacking the stitch type I needed for all of the projects I made over 2 years.   There was a silly moment, bourne out of my lack of sewing experience at the time, when I returned my machine to the shop and got a replacement as I thought the tension dials had become faulty.   What I realised later was that this was not the case- it had just been skipping stitches as I hadn’t used the correct combination of needle, thread, tension and fabric.   However, the replacement of the machine did mean that I had a new screwdriver, having lost mine early on under the sofa somewhere.

This machine tackled everything I asked of it and I never had any troubles with it.   The only reason I changed was that my sewing abilities had improved and I wanted a machine with options of different settings that the Brother didn’t have.

When the time came to upgrade I ummed and ahhed for a while and finally settled on this beauty, the Janome DKS100. What a difference this has made to my life.   Not only does it have the option to backstitch, it also has a built in locking stitch and a pre-programmed stitch that automatically does the locking stitch at the beginning and end of the seams for you.   Utter genius as I so often forget to backstitch at the beginning.   When you take your foot off the pedal it automatically stops in the needle down position and there is a handy button to lower the needle before you start stitching- No more fiddling around with the hand wheel- in fact I don’t think I’ve touched that since I bought it.
image

The foot control my Janome came with initially was faulty- it was trying to run off with itself when my foot wasn’t on the pedal.   I realised this halfway through making a skirt and Tobi asked how on earth I was going to complete my project. “Easy peasey” I responded and unplugged the foot control and used the start/stop button and the speed control to finish my garment.

There’s so many features of this machine that I love but what I didn’t really expect was that it would make sewing so much easier, smoother and quieter.   My four-year old son, Eli, hates loud noises- he can’t stand it when I get the overlocker out, but he doesn’t even comment when the Janome comes out.   It’s so quiet you can easily have a conversation whilst stitching and I definitely can’t say that for the overlocker.

Obviously I haven’t tried every sewing machine on the market but I can say that I love my Janome and I’m so pleased about the decision I made.   I keep my fingers crossed for many more years of easy sewing.


Disclaimer: I was not asked to review these machines by anyone and the opinions are all my own.   The Brother LS14 is available from other sites but the one I have included is NOT an affiliate link.

Me-made May 2015 Part 2

Well, I made it. Although I sort of cheated on day 31, but more of that later. If your memory is as fleeting as mine I shall remind you that I pledged you wear at least one me-made item every day during the month of May. My unofficial hope was that I would do this with no repeats; or if I did repeat a garment it would be with another previous unworn item.

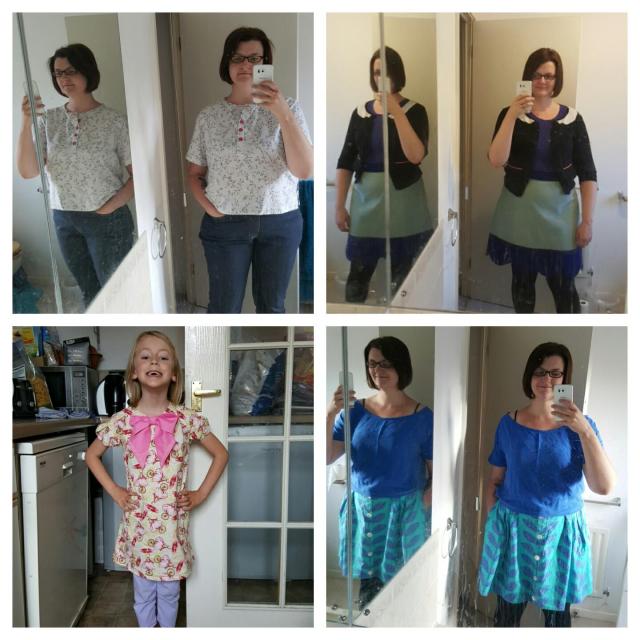
So here’s the run down from the second half of May.

image

I had some issues with my collage app this evening and couldn’t figure out getting the numbers on- technology fails me late on a Sunday evening. I’ll just go clockwise from top left.

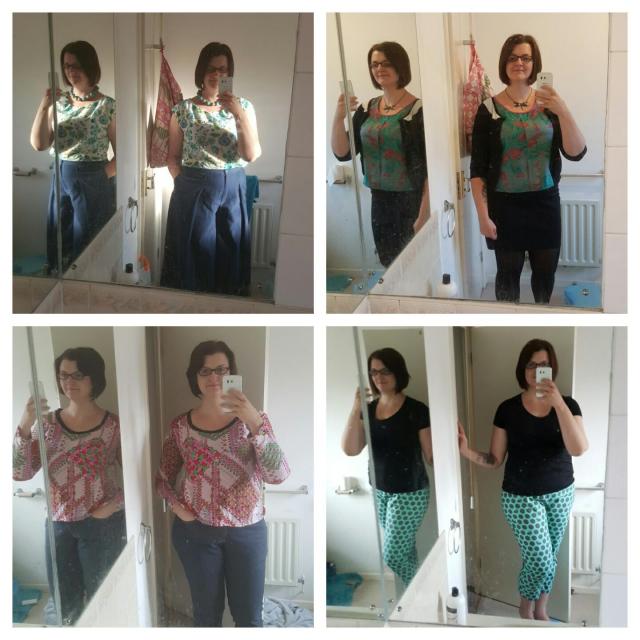
Spit up and Stilettos Atalie top with Closet Case files Ginger Jeans, Colette Patterns Meringue skirt with RTW t-shirt and cardi, silk tee from the second Great British Sewing Bee book and my daughter wearing leggings and a Burdastyle dress.

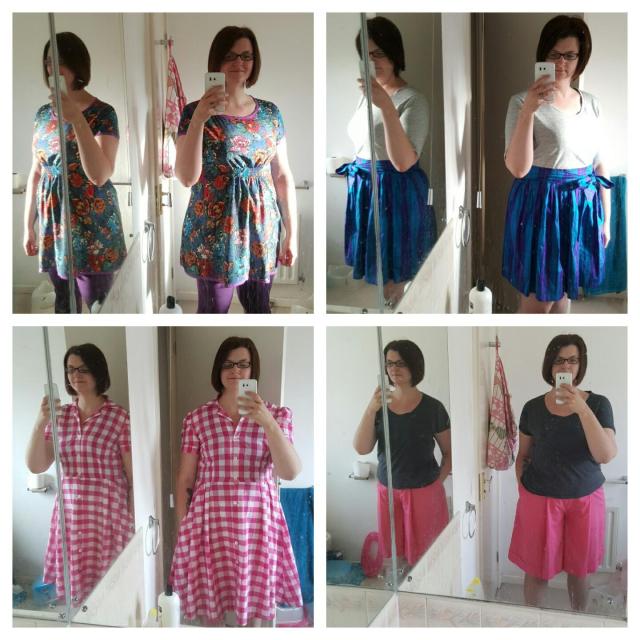
image

Tunic from a Prima magazine and self-drafted leggings. Top right needs a special mention as the skirt is one of my early makes which I made for my father-in-law’s funeral. I wore it on the two year anniversary of his death. Worn with grey Deer and Doe plantain top. Burdastyle Culottes and RTW top and gingham shirtwaist dress from Gertie’s Book for Better Sewing.

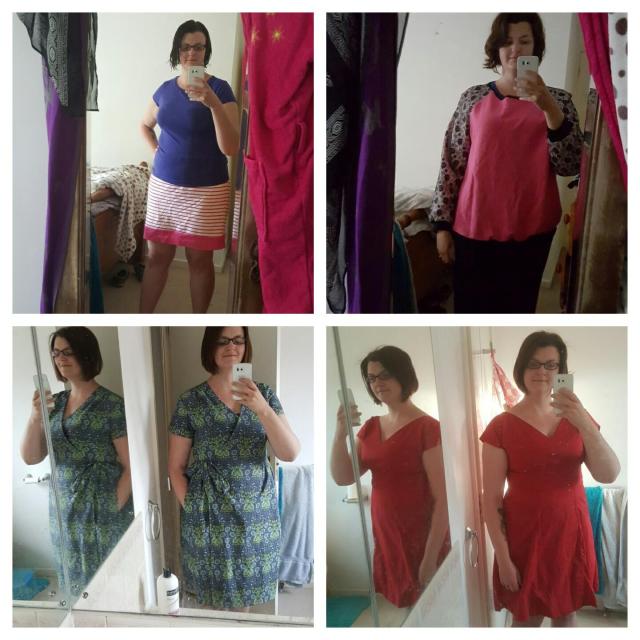
image

Self-drafted sweatshirt skirt and RTW tee, oversized Burdastyle raglan sweatshirt with experimental lace overlays, By Hand London Anna dress and a new make- the wrap dress from Gertie Sews vintage casual.

image

Burdastyle Palazzo trousers with a Portrait blouse from Gertie’s book for better sewing, Colette patterns Sorbetto top with mini version of easy knit pencil skirt from Gertie Sews vintage casual, Capri trousers from the third Great British Sewing Bee book and a Plantain top and my Ginger jeans again.

I cheated a bit on day 31 (capri trousers) because, although unique me-made remained in my wardrobe, none of them are particularly wearable, mainly due to fitting issues. These sadly need to be pulled out and passed on to better homes. So on day 31 I sewed up the Capri trousers, having been working on the fitting since the previous weekend. Being only 4 pattern pieces they sew up really quickly so I chucked them on and snapped my selfie mid-afternoon. However I quickly took them off again because I haven’t got the fitting quite right and they’re still a bit gapey at the back. I can’t make up my mind whether to unpick the facing and take in the back darts. I may just perfect the fit in the next pair.

Anyway, I didn’t find any massive wardrobe holes. My Burdastyle sweatshirt was made a little while ago to fill the casual lounging around the house hole. My work wardrobe had dresses and co-ordinating separates. I have a few cardis but I’m missing slightly smarter outer layers. With that in mind I have just ordered the Grainline Morris blazer pattern and the Moss mini just because. I’ve been after a stable knit blazer for ages, so I’m excited about my first steps into outer-ish wear!!